Creating and Managing Templates
Manifest Maker helps users to digitize their procedures, create step-by-step instructions, and build Manifest Templates faster than ever.
Create a new Template
- From the Maker Home screen, select the + New Template button
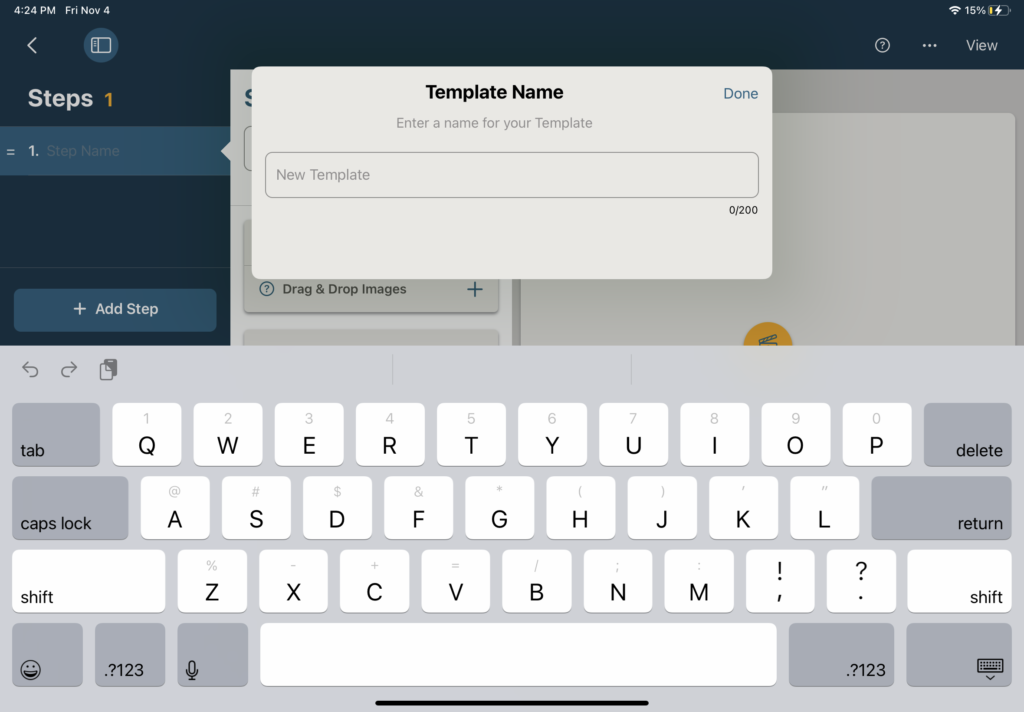
- Enter the Template Name in the pop-up window, and select Done
- The Template will auto-populate with Step 1 and display an array of tools which can be used to capture and organize step-by-step work instructions.
There is no set order in which a Template should be built. Each user’s process and required tools may vary. Instructions on how to take advantage of the various Maker tools for generating a Template are all outlined below.
Edit Template information
To edit or add Template information (such as a description or Asset information), access the Template info in one of two locations:
From View:
- While in the Template, select View in the upper right-hand corner of the screen
- From the top section titled “Template info”, select Edit
- A modal window will appear with options to add or edit the following Template info:
- Template thumbnail
- Template Name
- Description
- Asset info
- Author
- Select Done to save
From the Home page:
- Select the info icon in the lower right-hand corner of the Template tile
- A modal window will appear displaying the Template info, including date & time created, last modified date, and size
- Select Edit to open a new modal with options to add or edit Template info (fields outlined above)
Videos
The Maker video tools make capturing and digitizing procedures quick and easy. Users can record themselves or another expert performing a task from one or multiple points of view, even narrating their actions as they go, and then use the Maker tools to build out their Template.
A sample scenario might be a user setting up their iPad on a tripod to record from the third person perspective while also wearing a GoPro camera to capture the first-person close-ups. Both videos can be used to build out Step instructions from auto-generated text from the video narration, along with still images or video clips from their recordings. Read on to learn more details about these tools.
Adding Videos
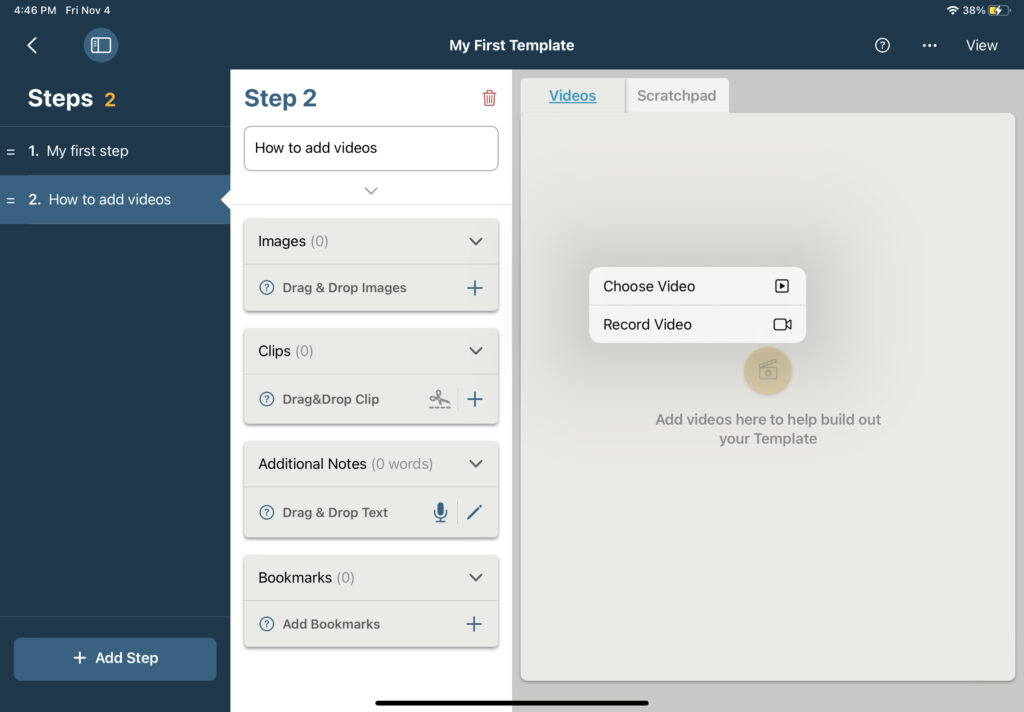
To add a video to the Template, select the yellow clapperboard icon in the Videos tab. A popup with two options will appear:
- Choose Video: This option will open the device Photo Library
- Choose the desired video and select Add
- Record Video: This option will open the device camera
- Select the red ‘record’ button and begin recording. Once finished, select the ‘record’ button again to stop and the video will automatically import into Manifest Maker.
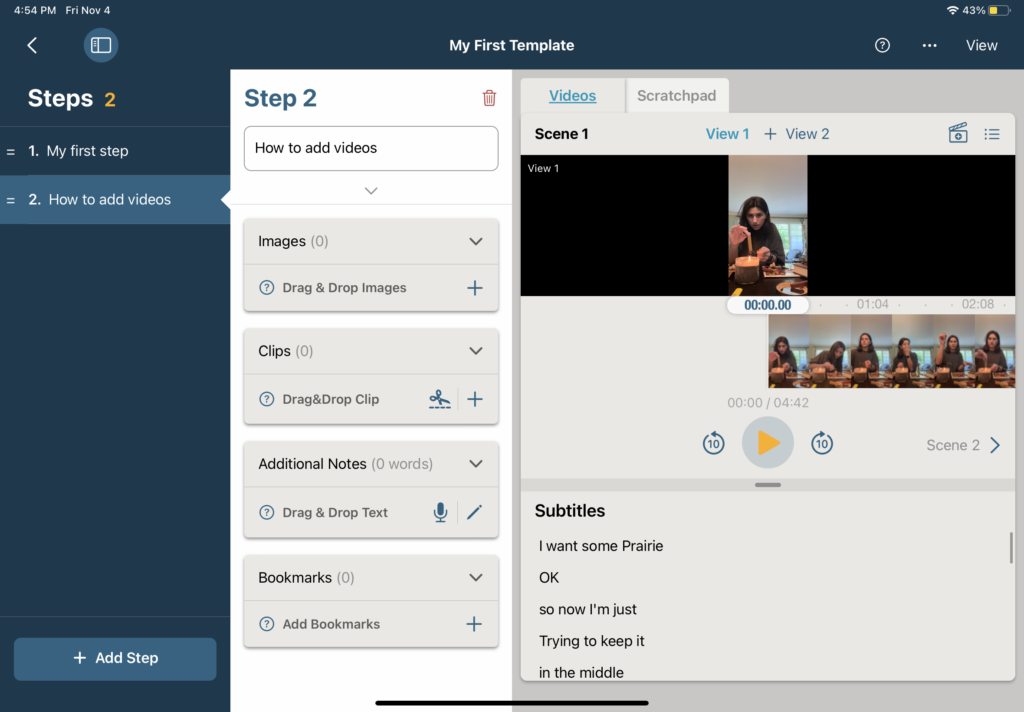
This initial import will create the first Scene. Scenes can be used to organize specific segments of a procedure. Within each ‘Scene’, users can upload different ‘Views’. A ‘View’ would be the same Scene recorded from different perspectives (first person, third person, etc) and can be reviewed together when building out a Template. This allows users to review side-by-side videos from different angles and select the optimal vantage point to clip videos or grab still images for Step instructions.
Adding and Managing Scenes
To create a new Scene, select the clapperboard icon in the top right corner of the Videos tab. A popup will appear with an option to Choose Video or Record Video. Select the desired option to add a video to the new Scene.
Navigate between Scenes using the arrows beneath the video.
To manage Scenes, select the bulleted list icon in the top right corner of the Videos tab.
- Select the dropdown arrows to see and manage the Views within each Scene
- Select the pencil icon to edit Scene names
- Select the trash icon to delete a Scene and all of its Views
- Select Add Scene to create a new Scene
Adding and Managing Views
To add a new View to an existing Scene, select + View (#). A popup will appear with an option to Choose Video or Record Video. Select the desired option to add a video to the new View.
Navigate between Views by selecting the desired View title at the top of the Videos tab.
To manage Views, select the bulleted list icon in the top right corner of the Videos tab. Use the dropdown arrows to see and manage the Views within each Scene.
- Select the Play icon to watch the video
- Select the Download icon to export the video
- Select the Trash icon to delete the video
- Select + Add Video to add a View to an existing Scene
Autogenerated Subtitles
If the video’s audio contains speech, a transcription will autogenerate in the Subtitles section. This text can be dragged and dropped into the Step Name textbox or the Additional Notes section.
Scratchpad
About Scratchpad
The Scratchpad is a great place to capture and organize text instructions that can be used to build out a Template. There are three (3) ways to add text to the Scratchpad:
- Type: Type in the Add text textbox and select + to add it to the Scratchpad
- Speech-to-Text: Select the Microphone icon to begin a speech recording. When finished, select the Stop icon. Using speech recognition, the recorded audio will be converted to text and then automatically added to the Scratchpad
- Scan: Select the Scan icon to capture text from a printed document and convert to digital form
Scan to text
To add text to the Scratchpad using the scan to text function, follow these steps:
- Select the Scan icon which will open the device camera
- Line the camera up with the text to be scanned
- From the captured photo, select either ‘Use Photo’ or ‘Retake’ to try again
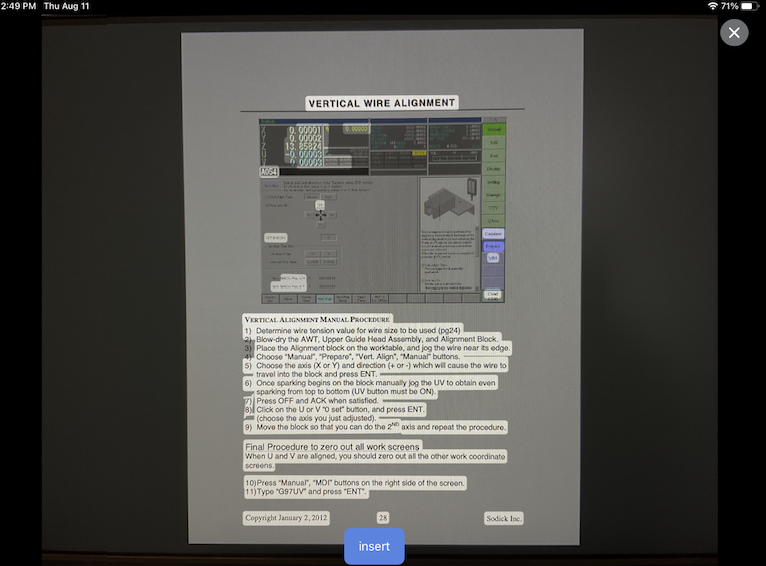
- From the photo, the app will highlight any detected text
- Select Insert to insert all highlighted text
- To only add specific portions of the highlighted text, tap and hold on the desired text (it will turn blue) and then select Insert
- Edit the text within the textbox if needed and select + to add to the Scratchpad.
Deleting text in Scratchpad
To delete text in the Scratchpad, select Manage Notes in the upper right-hand corner of the Scratchpad. This will display all blocks of text with a Trash can icon to the right. Select the Trash can to delete the selected text.
Building a Template
Adding and editing Steps
- To add new Steps, select + Add Step.
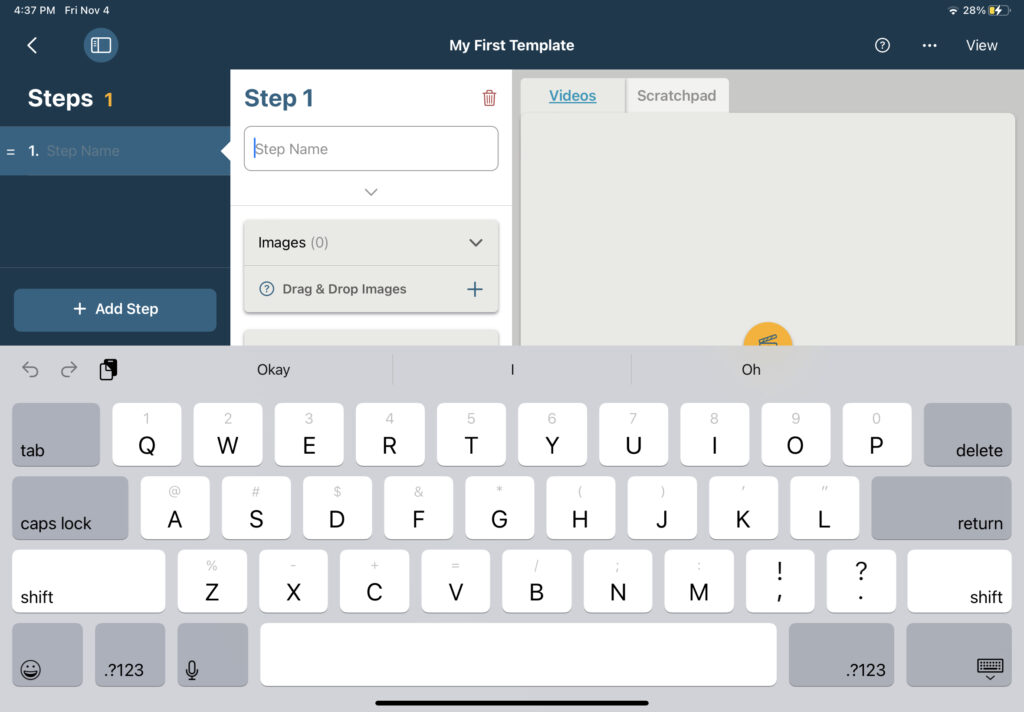
- To create the Step Name or instruction, enter text into the Step Name field. This can be done using:
- Standard keyboard entry
- Scan Text
- Or, by dragging Video Subtitles or Scratchpad text over to the input box
- Note: The Step Name acts as the primary text that displays on the Step. There is no character limit, but it is recommended to keep this instruction concise and easy for someone to follow.
- To reorder Steps, select the Step Name in the left-hand list, hold and drag to the desired position
- To delete a Step, select the trash can icon above the Step Name
Using Subtitles and Scratchpad text to build a Template
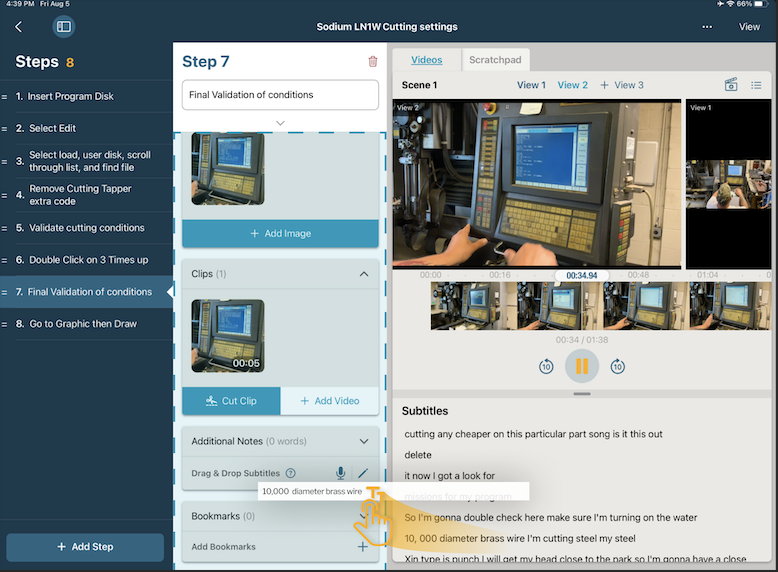
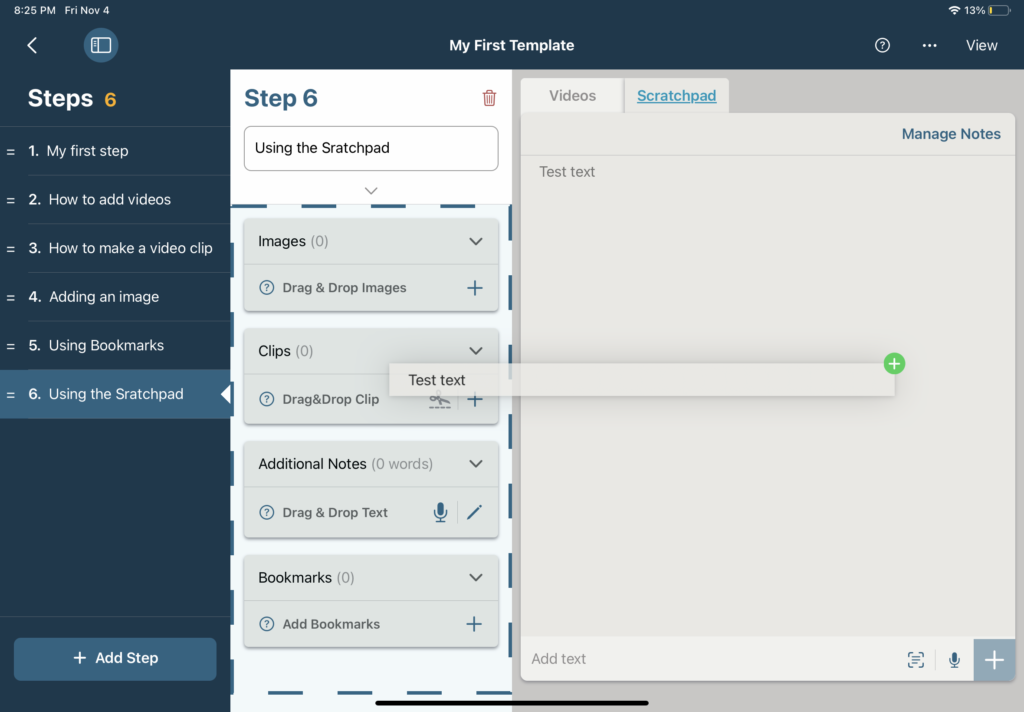
Once text is available in Video Subtitles or Scratchpad, it can be selected and dragged to any text input field in the Template. By default, the text will be grouped by the text blocks.
- To drag a full text block, select the desired text with a long hold and then drag to the desired text input box (e.g., Step Name, Additional Notes). When dragging, wait for the icon in the upper right corner of the text box to change to a green plus icon, and then let go. The text will automatically populate.
- To select only parts of the text in the block, use the highlight tool to select the desired text. Then select with a long hold until the text pops forward. Drag to the highlighted text – again waiting for the green plus icon before ‘dropping’ it into the desired input box.
Adding Images
Images can be added to a Step by creating an image from an existing video within the template or by importing a new image.
To create an image from a video:
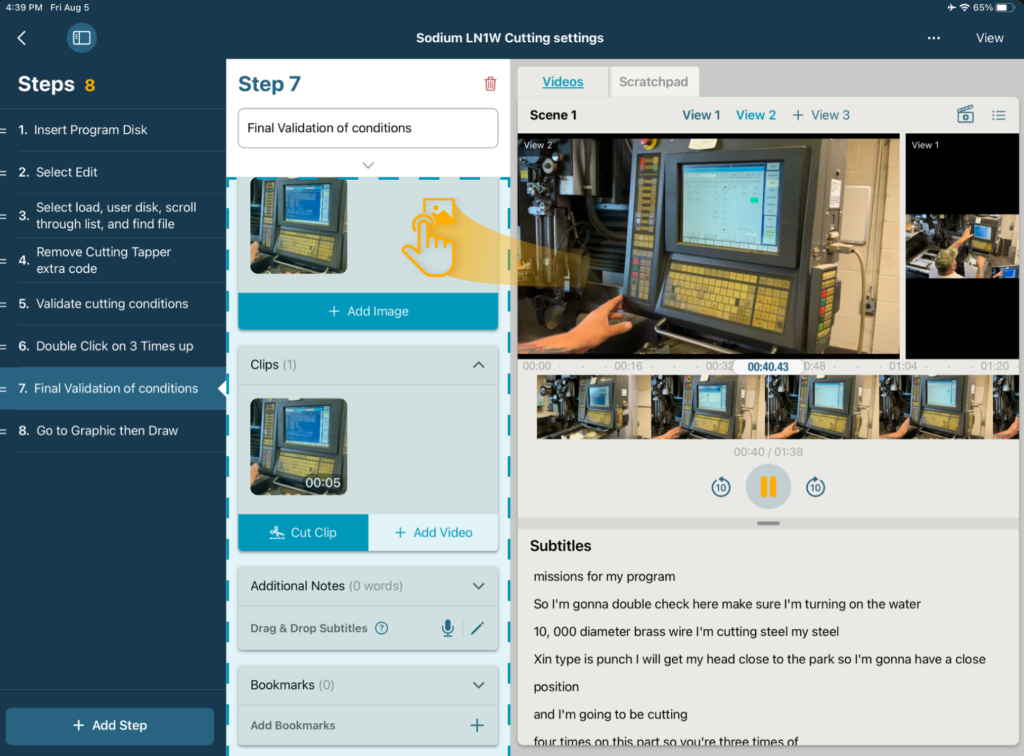
- In the Videos tab, navigate to the desired video
- Play or slide the frame viewer (back or forward) to the desired part of the video
- Once the video is paused on the appropriate still, select and long hold the still from the top video viewer
- Drag and drop the still to the Images section of the Step
To add a new image:
- In the Images section of the Step, select + Add Image
- A popup will appear with an option to Choose Image or Take Photo
- Select the desired option to add an Image to the Step
Adding Clips
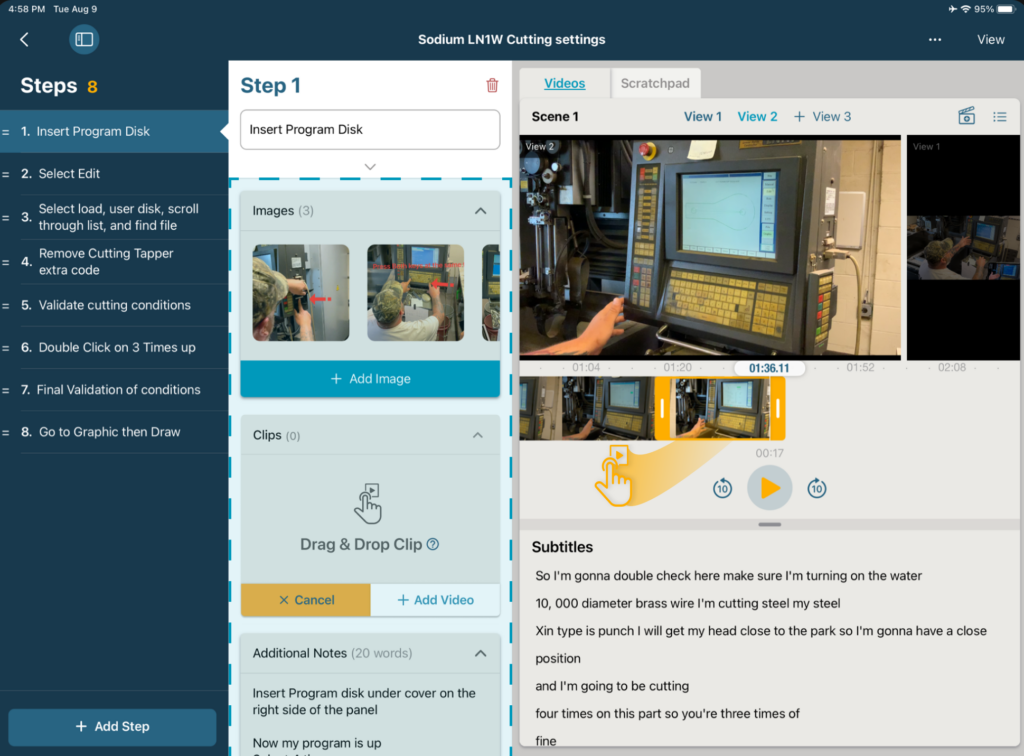
To add video notes to a Step or grab only a portion of a Scene video to illustrate a Step instruction, use the Clips tool.
To cut a clip from an existing video:
- In the Videos tab, navigate to the desired video
- Under the Step ‘Clips’, select the ‘Cut Clip’ scissor icon to turn on the Trim Handles
- From the frame viewer, tap and drag the Trim Handles to select the desired portion of the video
- Play the selection of the video and edit as necessary by dragging the Trim Handles back and forwards until the Clip start and end captures the appropriate part
- Once satisfied with the selected Clip, select and long hold the trimmed section in the frame viewer until a ‘play’ icon appears
- Drag and drop the video to the Clips section of the Step
To add a new video as a Clip:
- In the Clips section of the Step, select + Add Video
- A popup will appear with an option to Choose Video or Record Video
- Select the desired option to add a video to the Step
Adding Bookmarks
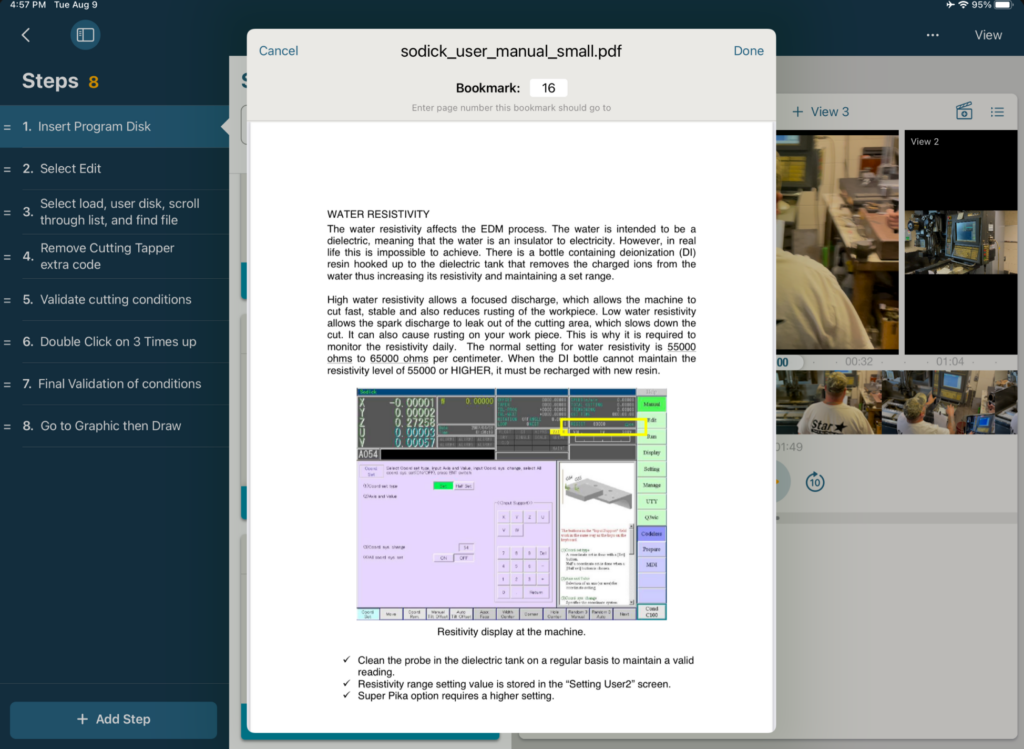
Bookmarks allow users to upload Documents (Manuals, Guides, Schematics etc.) related to the procedure and associate specific pages to a Step instruction.
To create a Bookmark:
- In the Bookmarks section of the Step, select + Add Bookmark
- Select from a previously uploaded File OR select + Add File to upload a new PDF
- Scroll to the desired page to be bookmarked, or enter the page number in the input box next to ‘Bookmark:’
- Select Set Bookmark
Adding Additional Notes
Use Additional Notes to add further instruction or notes about a Step in the Template. There are three (3) ways to add Additional Notes:
- Type: Select the pencil icon OR if the Additional Notes section is expanded, select Tap to Edit
- Type text within the modal and select Done
- Dictate: Select Dictate in the Additional Notes dropdown
- Speak clearly and select the Dictate stop button once finished
- Drag text from the Video Subtitles or Scratchpad: From the respective tab, select the desired text block in a long hold and then drag to the Additional Notes section
How useful was this post?
Average rating 5 / 5. Vote count: 1


