Prerequisites
Manifest supports Single Sign-on (SSO) using Okta. To get started you need the following items:
- An Okta account with an active subscription
- The following role to the client Okta account: Administrator
- The following role to the Manifest application: System administrator
SAML Authentication with Okta
- Sign in with Okta at https://okta-devok12.okta.com// For instructions to set up an initial Okta registration please visit here.
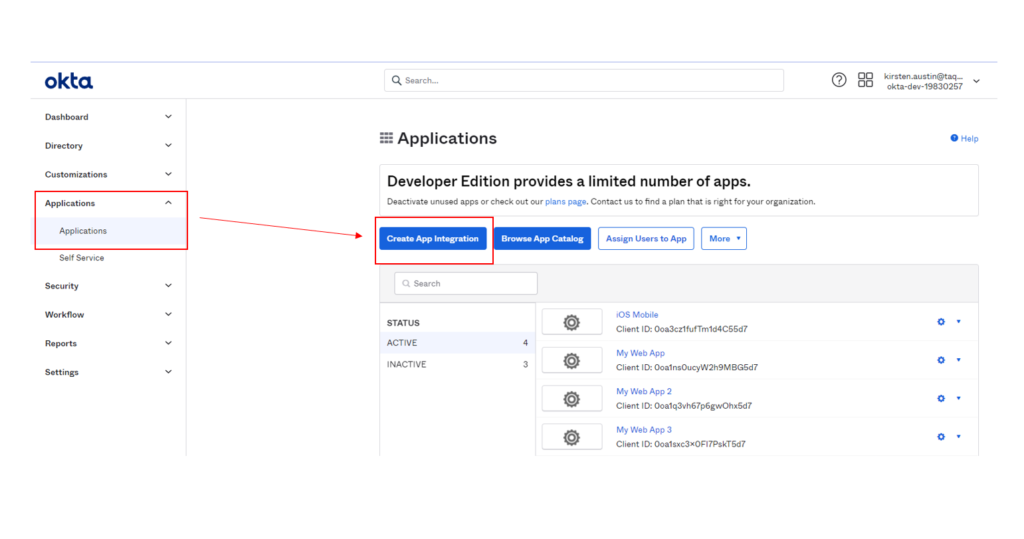
- Once logged into Okta, go to Applications and Click on Create App Integration
- Select the radio button SAML 2.0 and hit Next
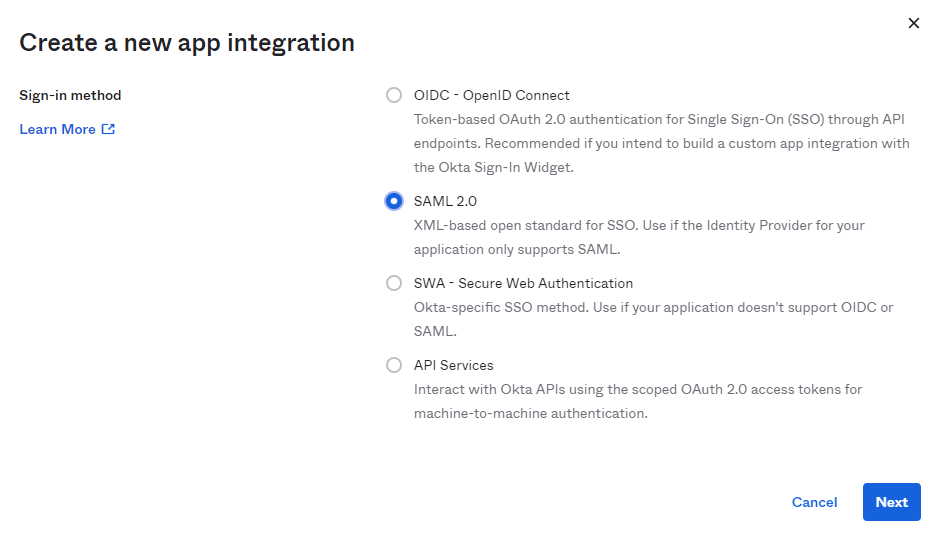
- Once you select “Next” a screen will open up prompting you to Create SAML Integration
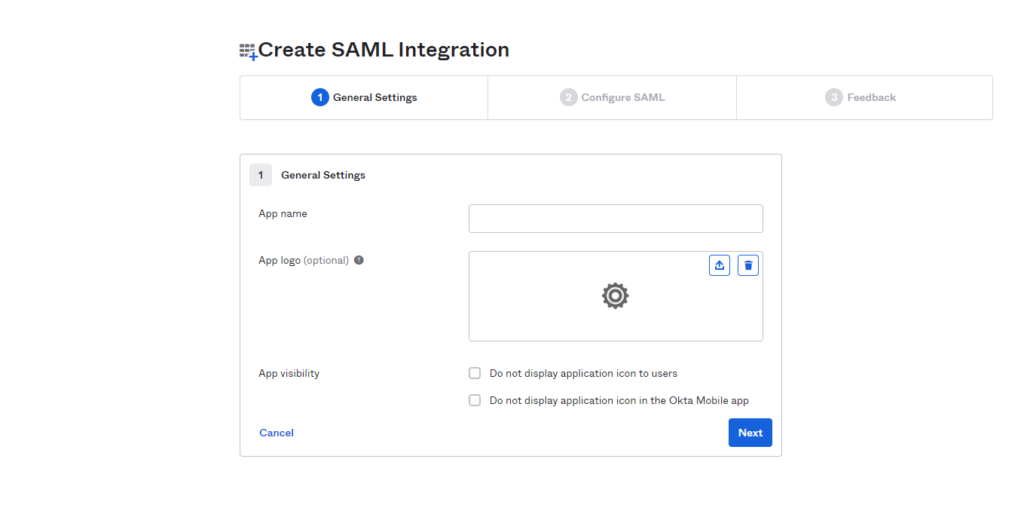
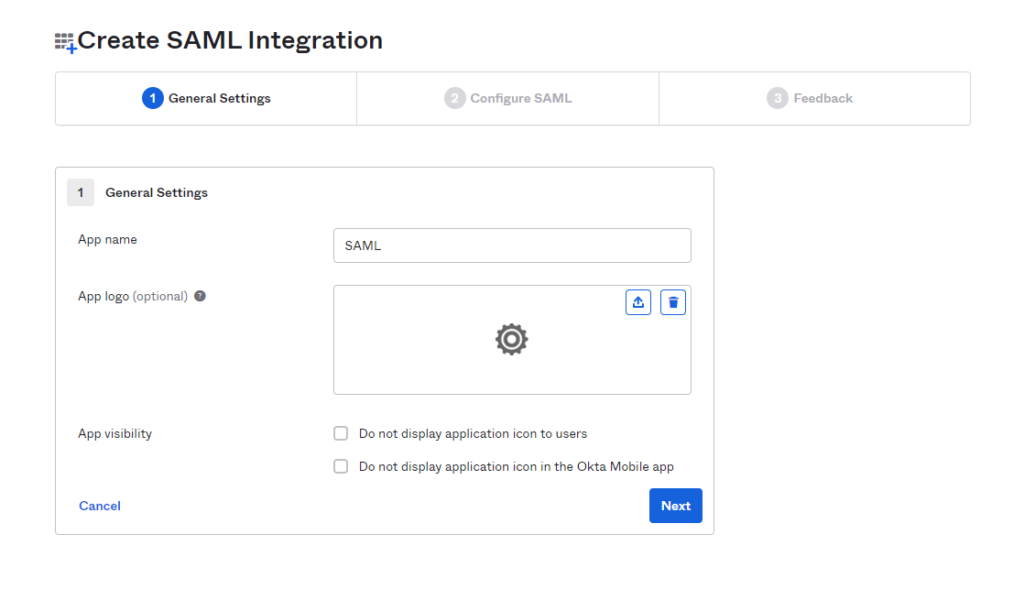
- Populate the App name field with your Application Name (ie: Domain Name) and hit Next
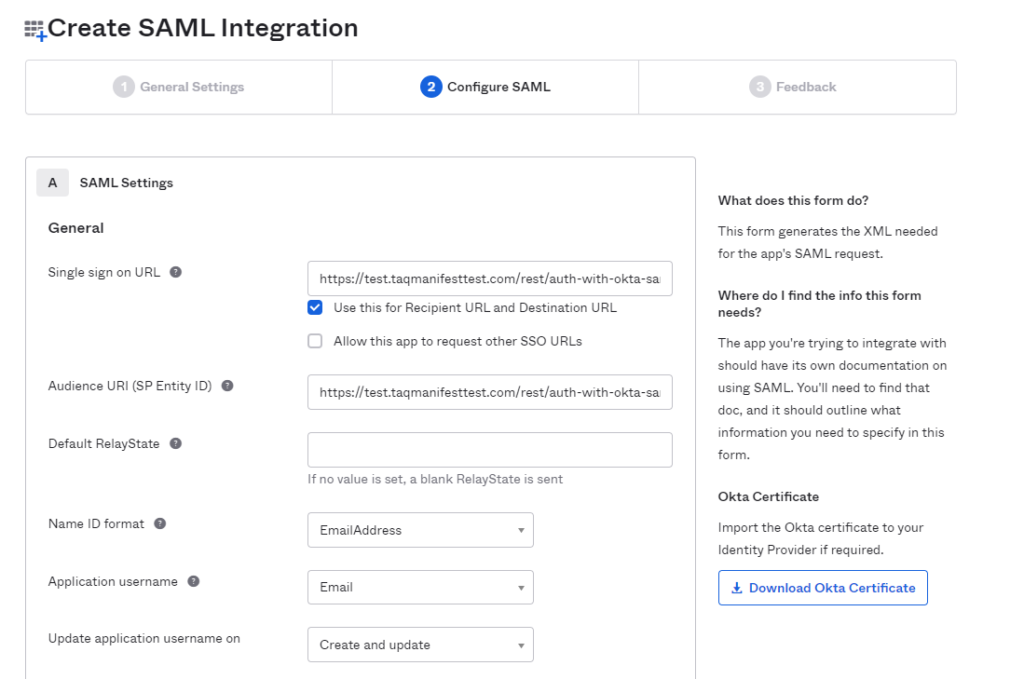
- Populate the Create [DOMAIN] Integration Page with the following information:
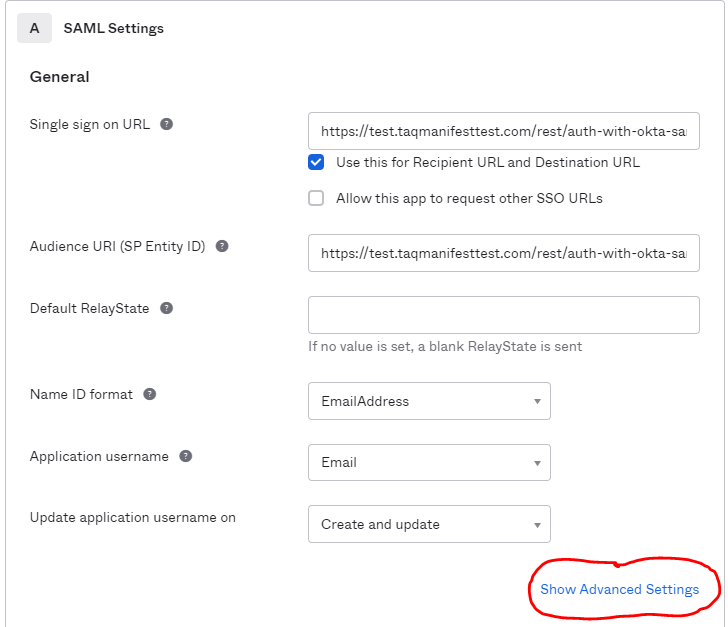
- Single sign on URL: Enter in the Manifest domain URL (ie: https://test.taqmanifest.com) and append the URL with the following /rest/auth-with-okta-saml.
- Make sure that “Use this for Recipient URL and Destination URL is checked
- Audience URI (SP Entity ID): Insert the same URL that was entered under Single Sign on URL
- https://test.taqmanifesttest.com/rest/auth-with-okta-saml
- Name ID Format: Select EmailAddress from dropdown
- Application username: Select Email from the dropdown
- Under Advanced Settings –> expand the Advanced Settings Options and scroll down to the Attribute Statements. Enter in:
- Name: Email
- Value: user.email
Hit Next
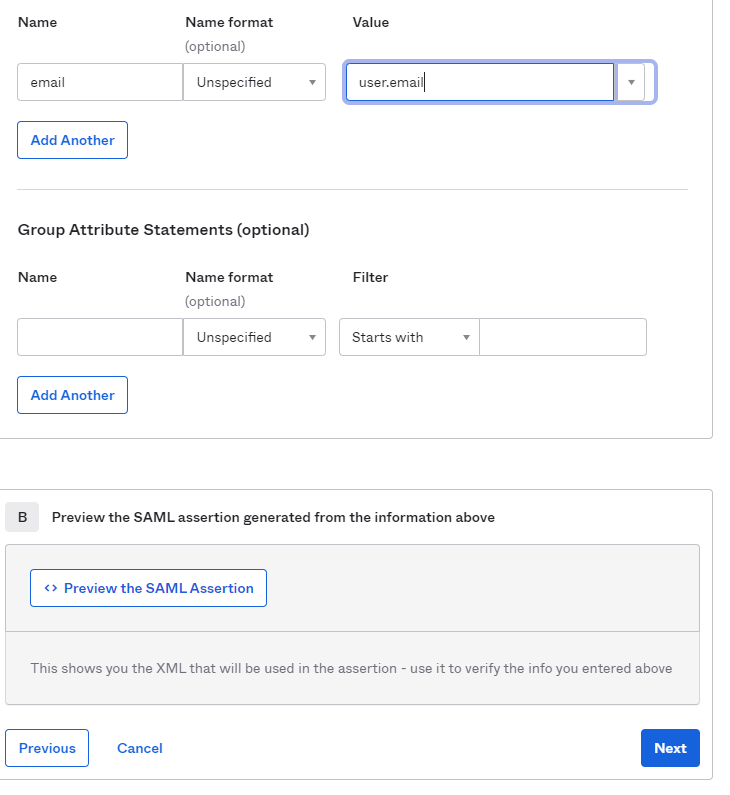
- Under “Are you a customer or partner” select the “I’m an Okta customer adding an internal app” radio button and then select Finish.

- Select “View Set-up Instructions”
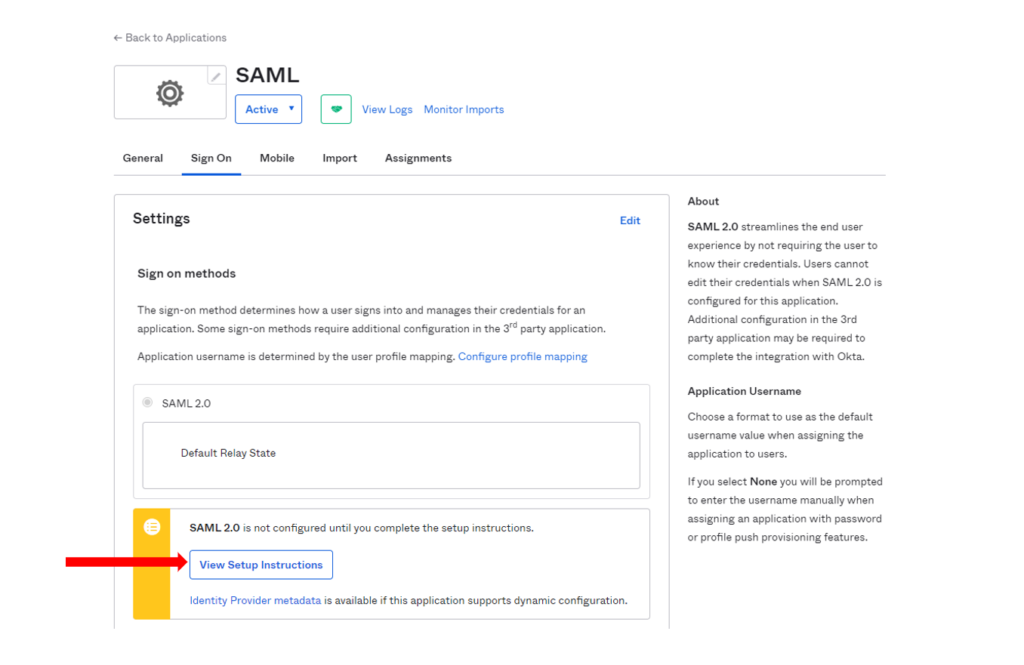
- Under Identity Provider Single Sign-On URL – copy that URL that is provided

- Go to your Manifest Web Application that you are setting up SAML within:
- Log in
- Go to Client Settings
- Click on Authentication Configurations
- Click on + SAML OKTA
- Under Resource URL –> Enter in the URL that you copied from Okta the Identity Provider Single-Sign on URL
- Hit update and wait for the Success message
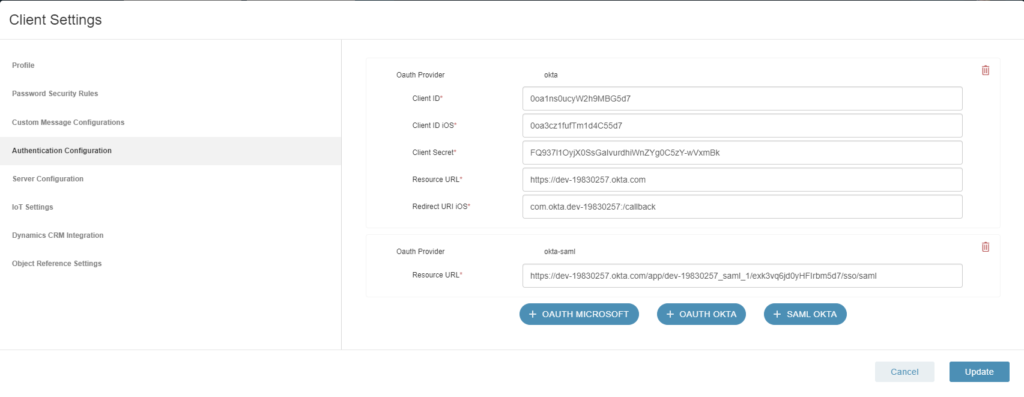
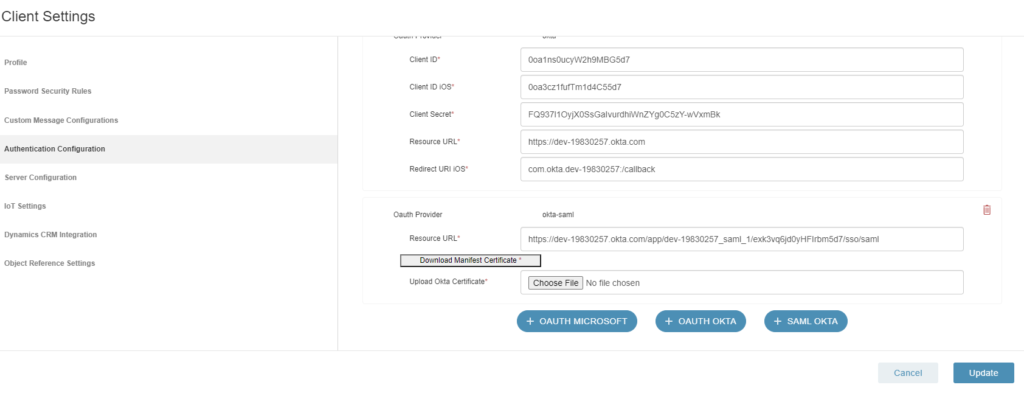
- Go back into Authentication Configurations under Client Settings and notice now there is a “Download Manifest Certification” button. Click on that button and download the Manifest Certificate.
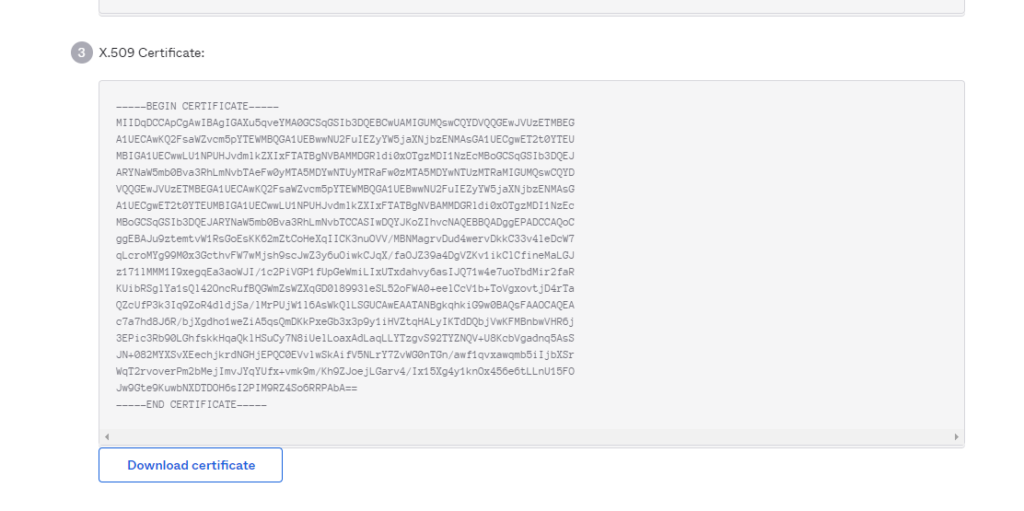
- Go back to the Okta application and scroll down under X-509 Certificate and Download the Okta Certificate.
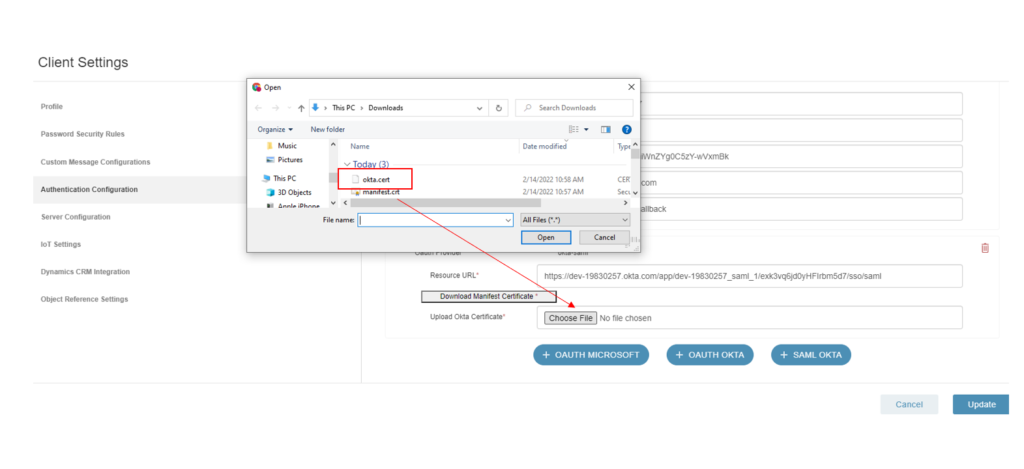
- Go back to the Manifest Web Application and under Authentication Configurations under Client Settings and select the Okta Certificate using the Browse functionality and upload the Okta Certificate and hit Update.
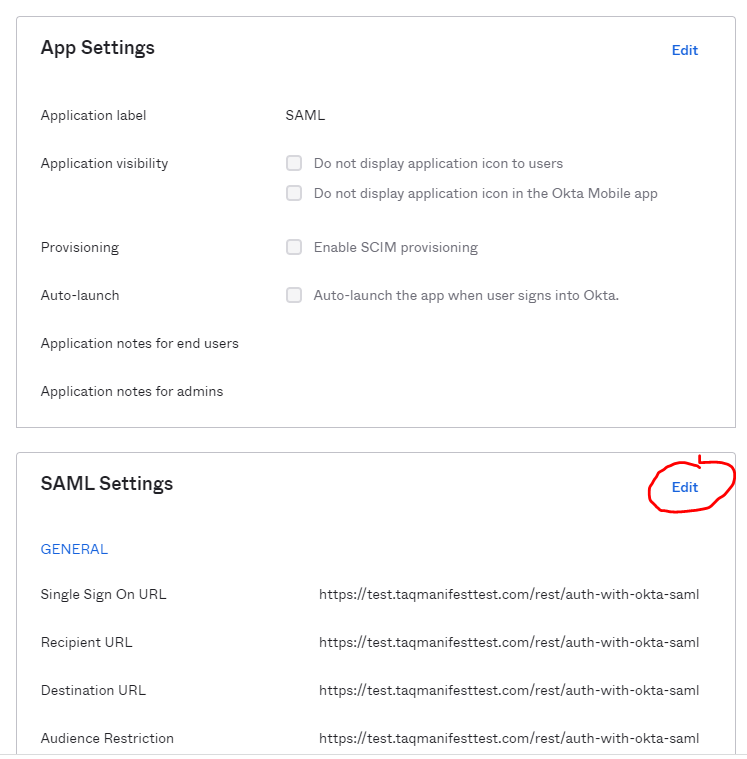
- Go back into Okta –> Go to General –> Go to SAML Settings –> Go to Edit –> Hit Next –> Go to Show Advanced Settings –> Scroll Down to Assertion Encryption and select Encrypted –> Browse Files and update the Manifest Certificate and hit Next.
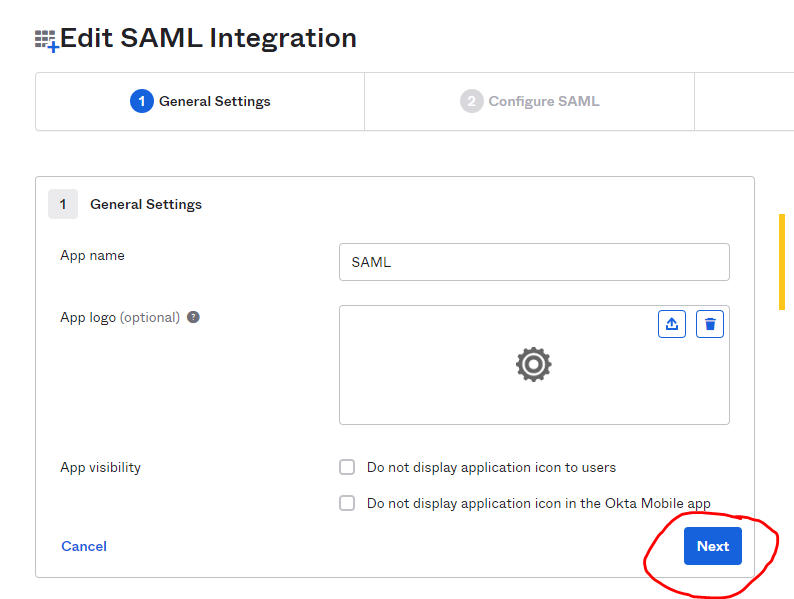
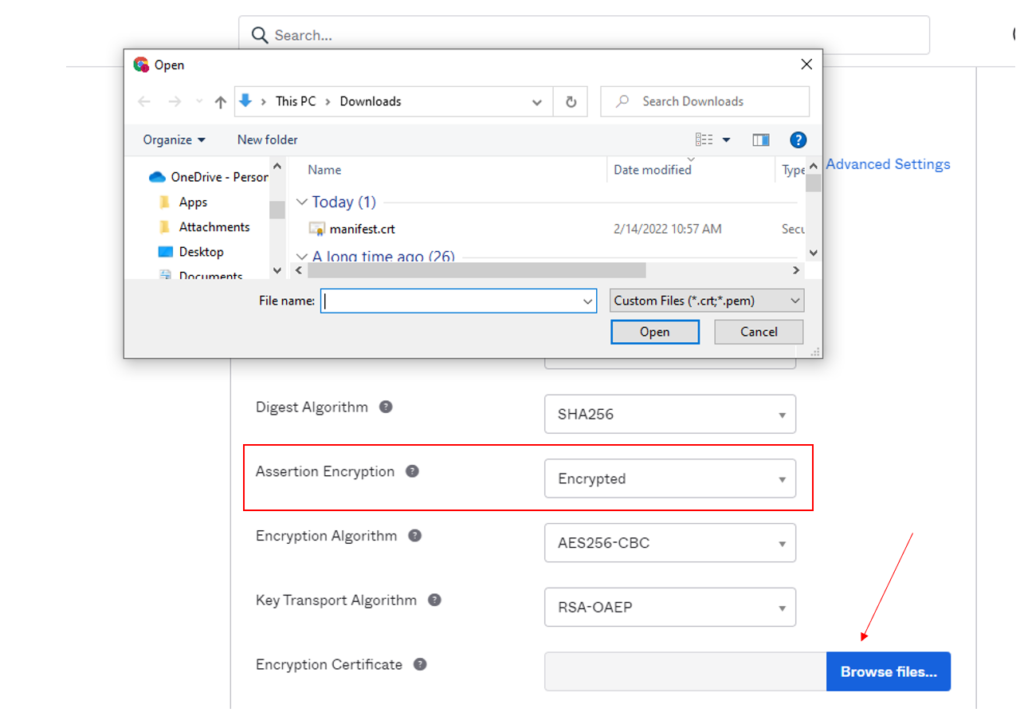
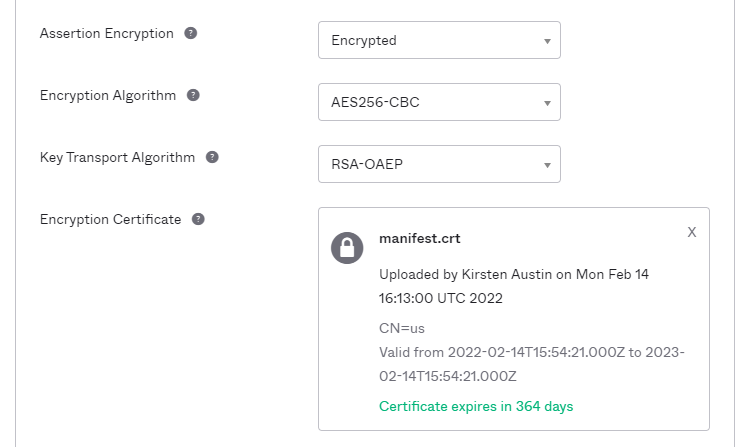
- Scroll down the page and hit Finish.
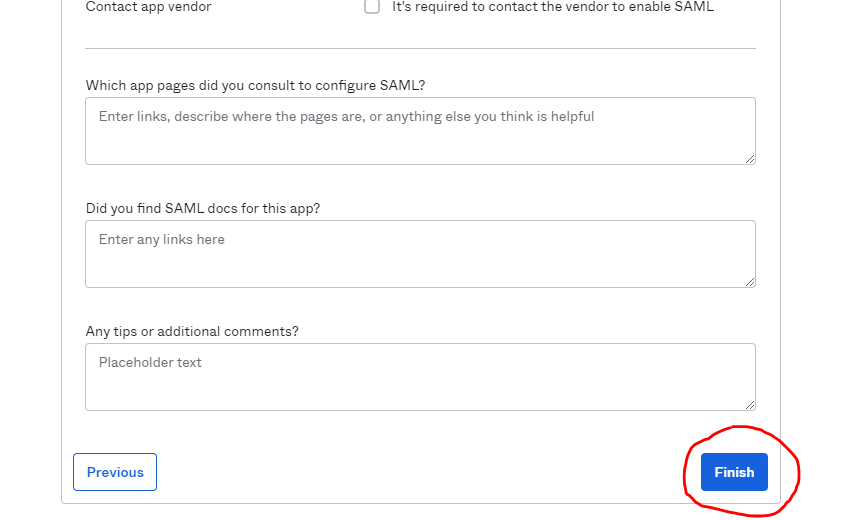
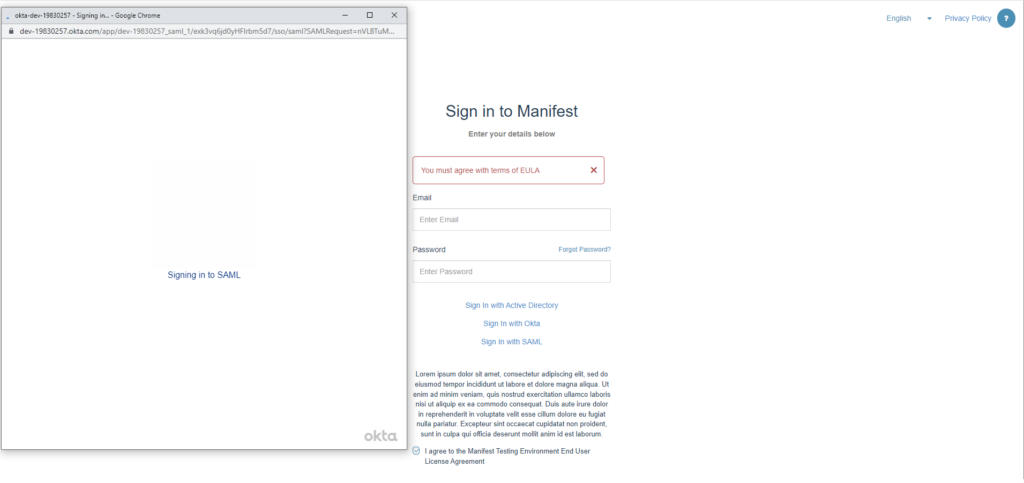
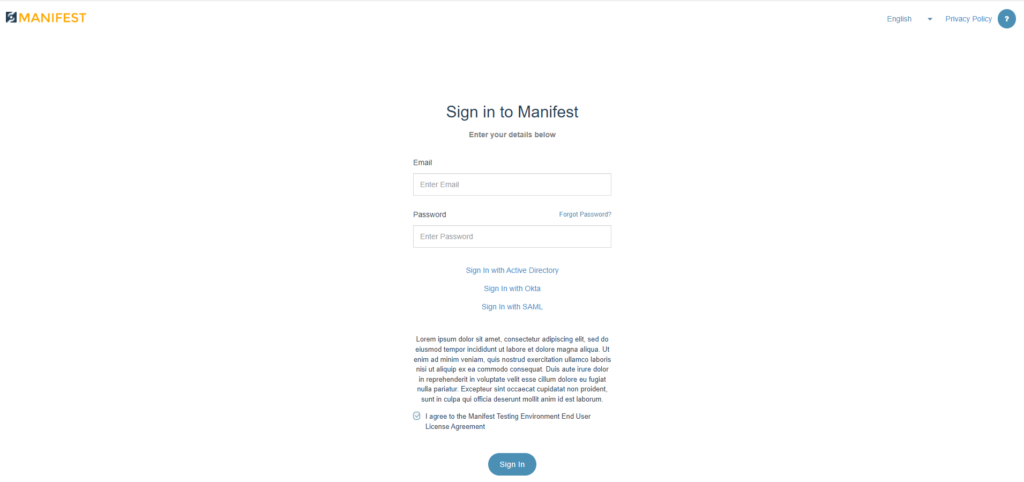
- Go back to the Manifest Web Application and Log Out. You will not see that the Sign In with SAML is now present as a Login Option. Select Sign in with SAML, accept the URL and hit Sign In.
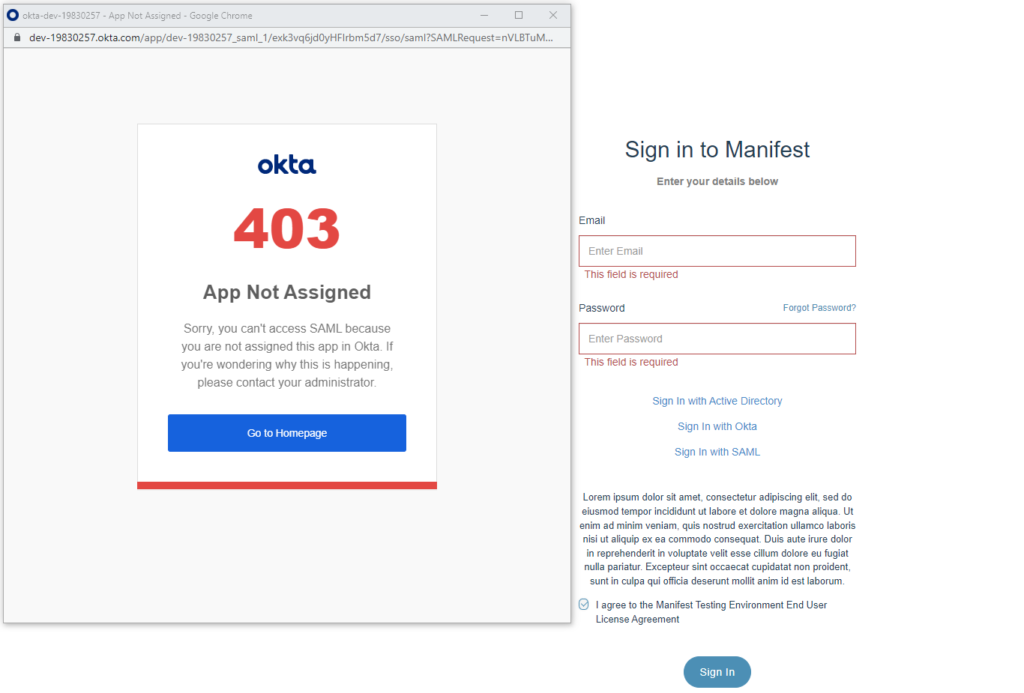
- If you are presented with this 403 App Not Assigned Error it is because you have not set up the User Permissions in Okta.
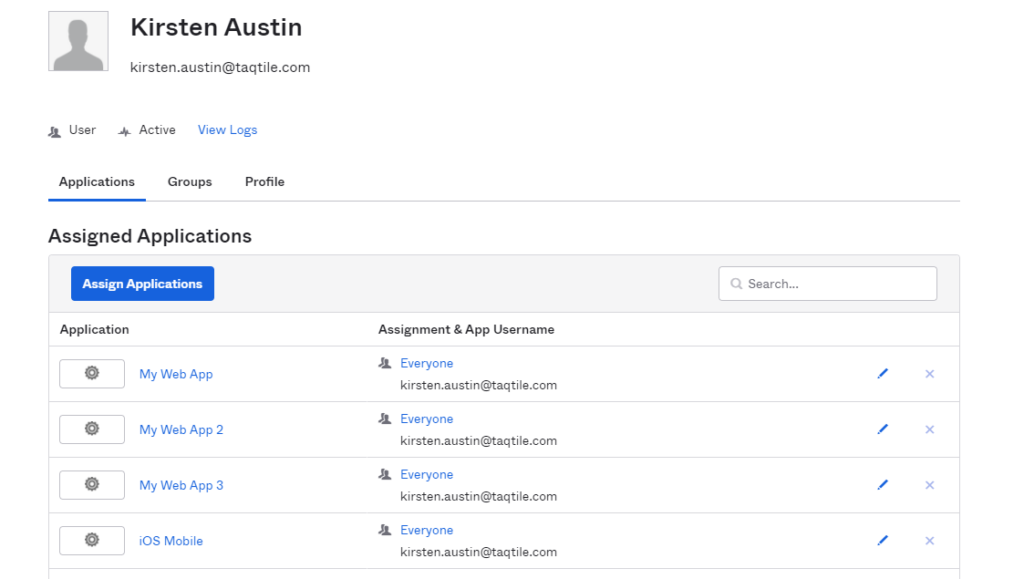
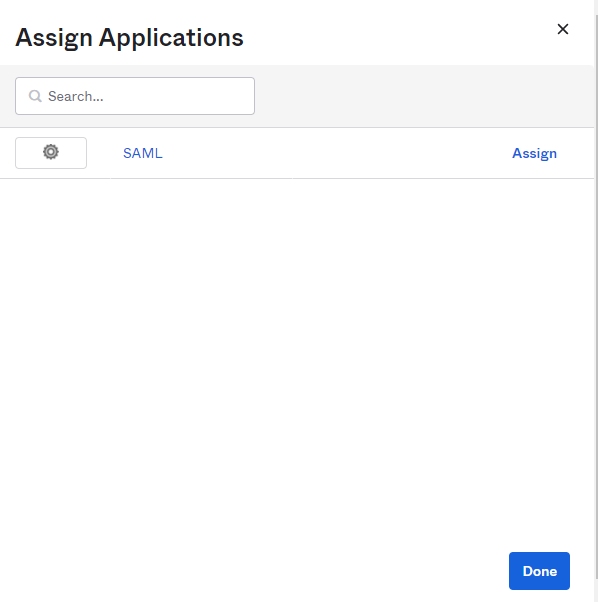
- Click on “Go to Homepage” –> Directory on the left hand navigation –> People. Click on the Person & username you would like to give permissions to use SAML Sign-In. Click on Assign Applications –> Click on SAML –> Assign to People and Assign to those who you want to grant SAML Sign In access to.

- Once completed, go to back to the Manifest Web Application and log in again using SAML Support and see that you will not be auto logged into the application.
