This is a guide on how to install Manifest in a Docker container on a Linux server. This also includes an explanation of how to create a new Azure Linux VM to host Manifest if one doesn’t already exist in your infrastructure.
Prerequisites
- Some expertise about Docker and how it works.
- Knowledge of Secure Shell Protocol (SSH) and SSH File transfer protocol (SFTP)
- An understanding of how to use the Linux command line and Linux file structures
Video Tutorial
Please use this Manifest On Premise Installation for Linux video tutorial to assist in the deployment of Manifest in an on premise environment.
Create an Ubuntu Server – Linux VM in Azure
- Login to the Azure Portal at https://portal.azure.com
- Create a new Virtual Machine Resource. By selecting Create –> Virtual Machine
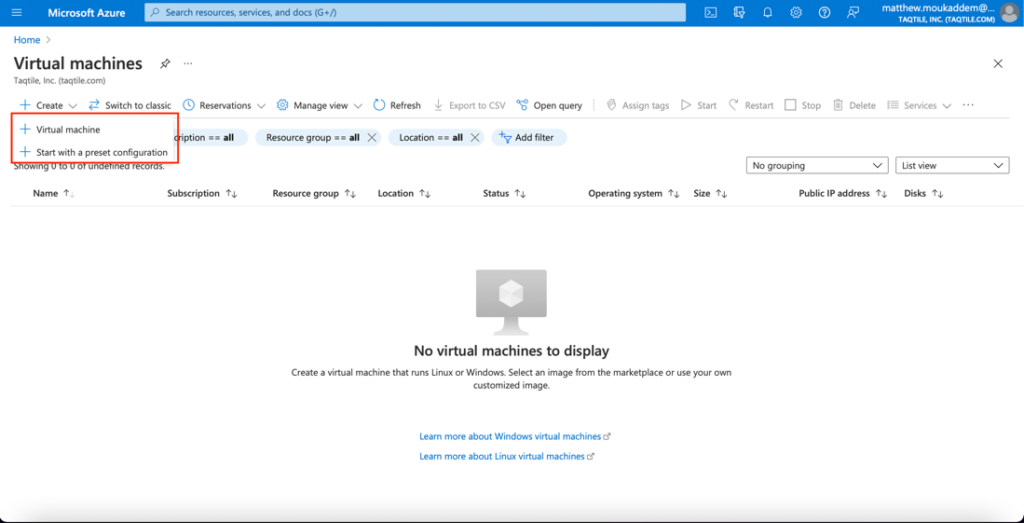
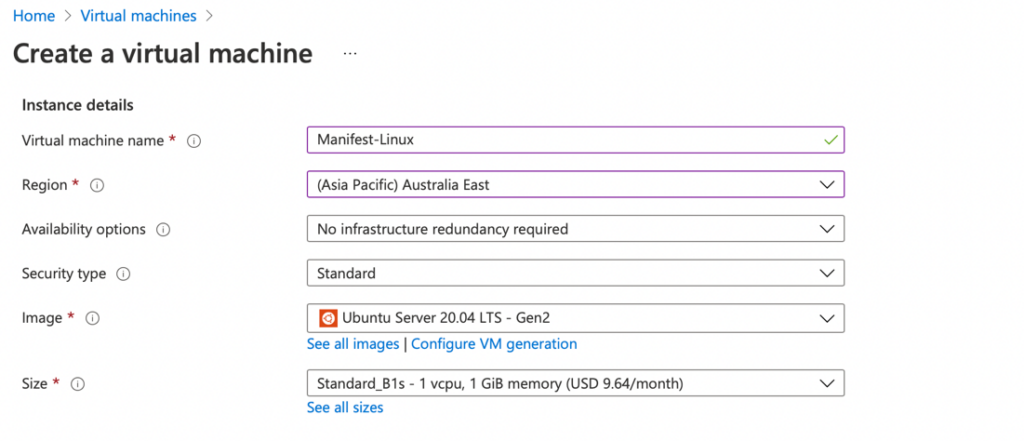
- Set virtual machine image to the Linux server image that will be used. Additionally, set the region and VM size to the desired value.
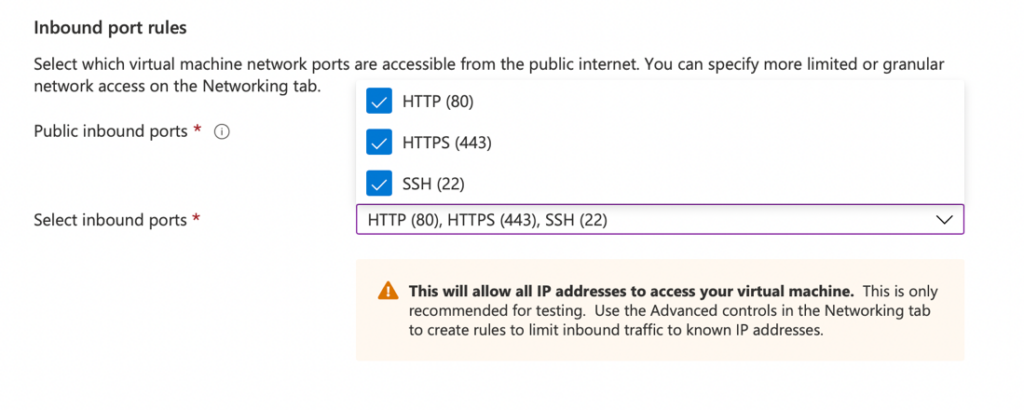
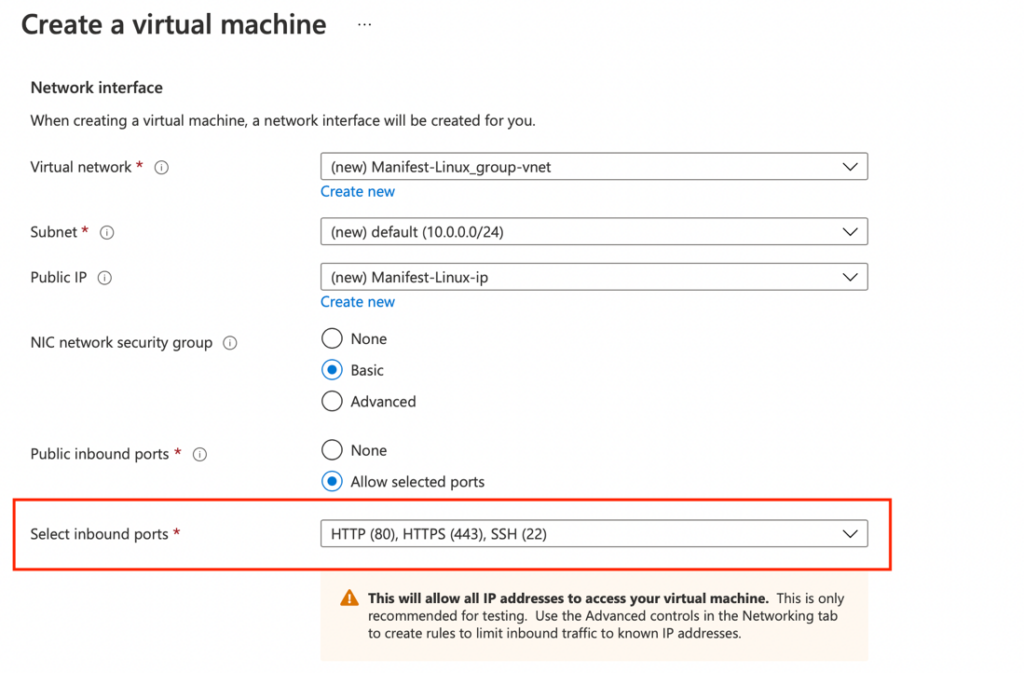
- Set inbound port rules to allow HTTPS, HTTP + SSH
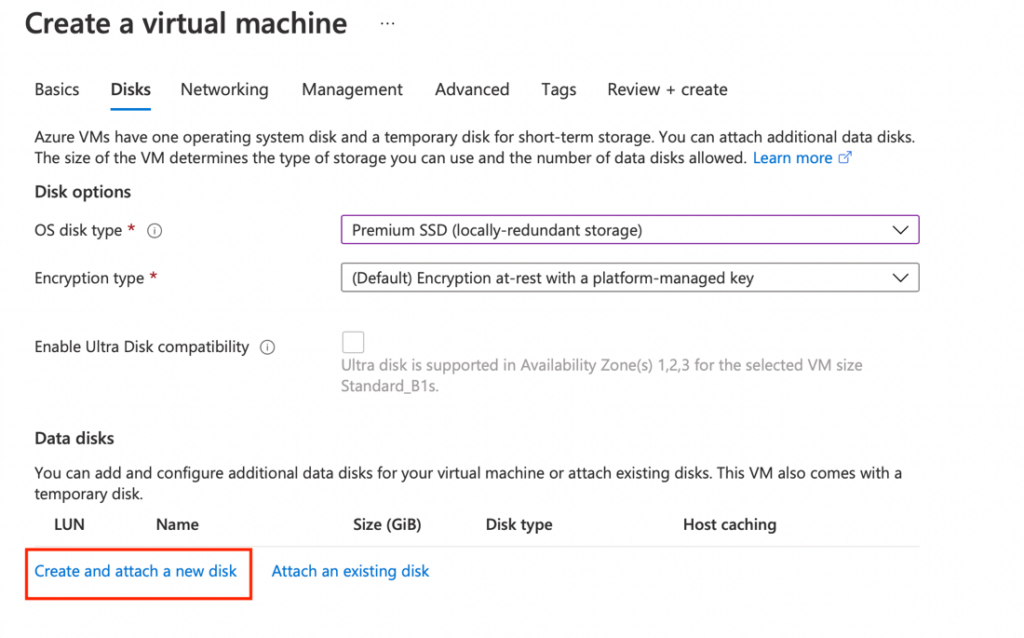
- To attach a separate data drive to house Manifest data separately from the OS drive, from the disks page select –> Create and attach a new disk.
- Confirm the Network interface settings are correct and that inbound port rules are set to allow HTTPS, HTTP + SSH
- Go to the Review and Create Page and confirm all settings are correct
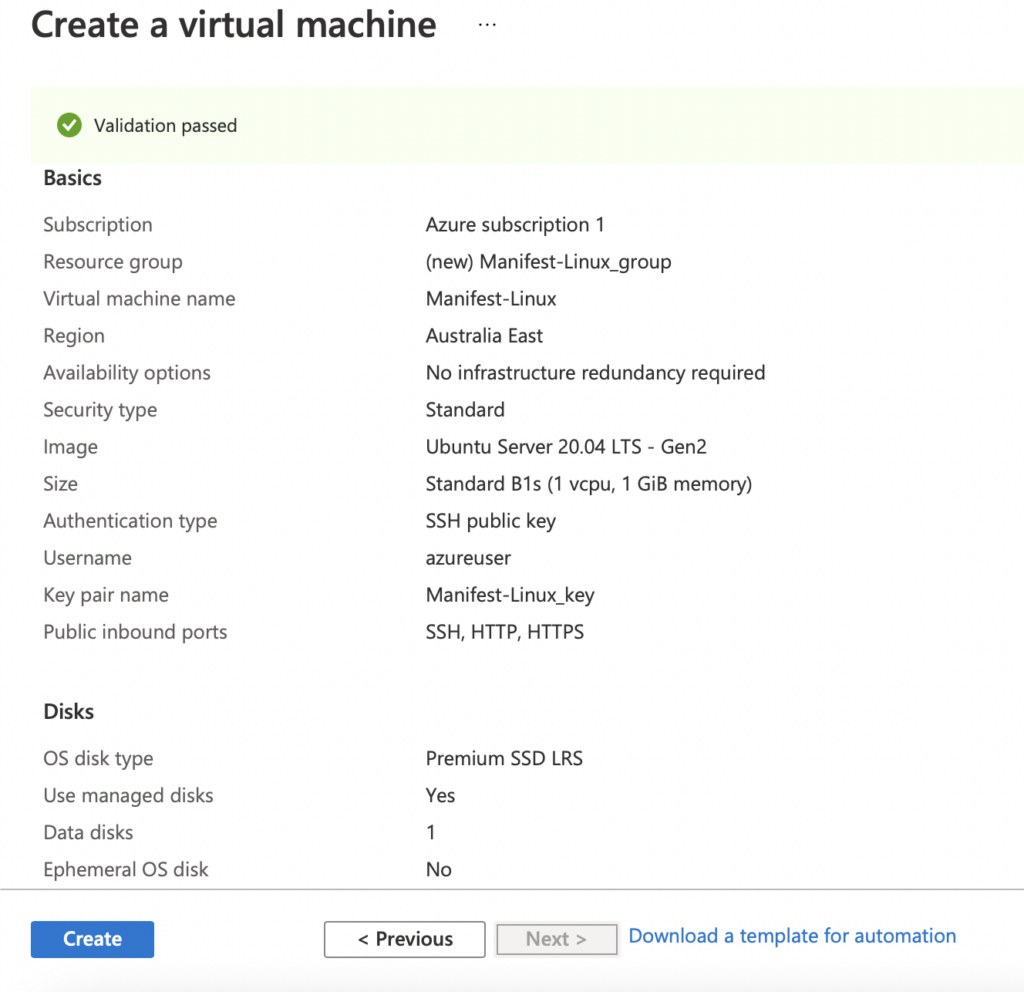
- If using a SSH Key Pair for access you will be prompted to download and save the private key for If using a SSH Key pair for access, a download prompt will allow the private key to be downloaded and saved for later use when accessing the VM. Please retain this private key to use for authentication later.
- Ensure the following inbound security rules have been created within the Network security group for the VM.

Configure Linux Server
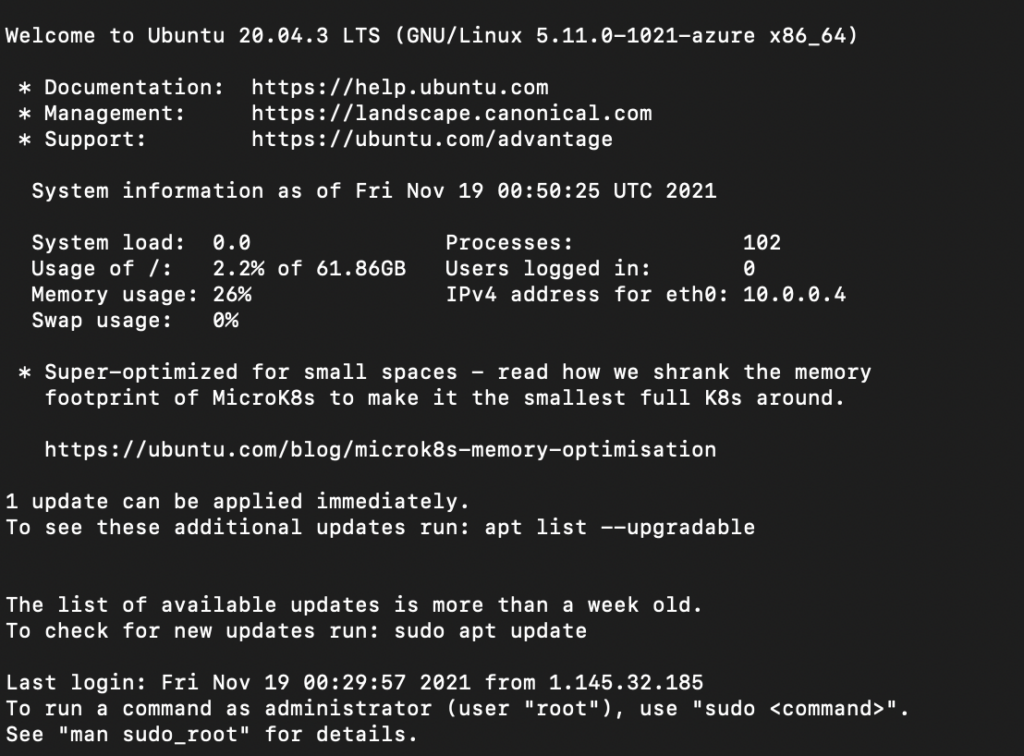
- Use the SSH key saved earlier to connect via SSH to the Linux Server. Any SSH client can be used to connect. Use the SSH Key downloaded earlier to authenticate successfully.

- After connecting successfully, a screen similar to below will be displayed.
- Navigate to the directory where the Manifest data will be stored.
- Create a new folder in the desired directory called ‘manifest’ by running the command: mkdir manifest

- Run the command “cd manifest” to enter the manifest folder.
- Download the Docker-compose template file from https://experts.taqtile.com/knowledgebase/docker/
- Set up environment variables in Docker-compose.yml file in accordance with the instructions on the expert’s site https://experts.taqtile.com/knowledgebase/docker/. A table is included that outlines the purpose for each environment variable.
- Where a file path is required for the Env Variable, use the full file path to the “manifest” directory you created earlier.
- Transfer your finalized Docker-compose.yml into the “manifest” directory on your Linux server.
- Install Docker and Docker compose if not pre-installed by following the Linux sections in Docker’s official instructions
- Login to the Manifest container registry by running the following command:
- sudo docker login taqtile.azurecr.io -u taqtile -p [please inquire for password]
Install Manifest on Linux Server
- Connect to the Linux Server over SSH and navigate into the “manifest” directory you created earlier.
- While in the “manifest directory” run the following command
- sudo docker-compose up –d
- A Linux account password may be required
- After pulling the required images, the Manifest containers will start automatically.
- Ensure inbound port 443, port 80, port 5349, port 49152-65535 and port 3478 are open on the Linux server to allow Manifest data traffic.
- Using a Chrome browser type in the IP address and confirm the Manifest client portal is displayed correctly.
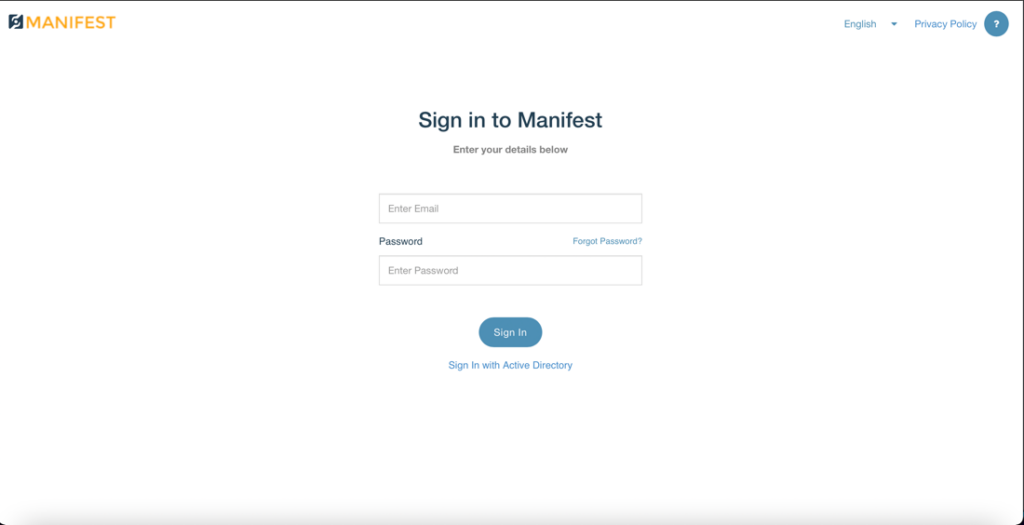
- Login in using the admin username and password supplied in the Docker compose file earlier.
Adding a Custom Certificate
- Open the Docker-compose.yml file
- Add the following information to the web container variables.
- CERTIFICATES: <put_here_path_to_folder_where_certs_will_store>:/usr/share/nginx/certs
- EXAMPLE: /c/manifest/uploads:/usr/share/nginx/certs
- Other certificates can be used by replacing the certificates in this folder and restart the web container. The replacement certificates will automatically be applied.
- IMPT! Certificates must be named “nginx-cert.crt” and “nginx-cert.key” in order to work. Without these file names, Manifest will create self-assigned certificates and will use those instead.
- Save the Docker-compose file back onto the Linux Server and restart the web container and the new certificates will automatically be applied.
How useful was this post?
Average rating 0 / 5. Vote count: 0


