Prerequisites
- On Windows, use GitBash which has openssl installed by default
- GitBash comes with Git for Windows which can be installed from Git for Windows
- Make sure you tick the GitBash option during installation which can be found in the start menu after installing Git for Windows
Steps to set up a Custom SSL Certificate
- Confirm Open SSL is installed by running the command “openssl version.”
- You should get a response like this “OpenSSL 1.1.1k 25 Mar 2021”. If you get no response from the command, it means OpenSSL is not installed correctly

- Unzip and copy the whole .ssl folder from this email to the C:\directory on your PC. The file contents will appear as hidden files on windows and the view hidden files option will need to be enabled in file explorer to view the folder contents once unzipped.
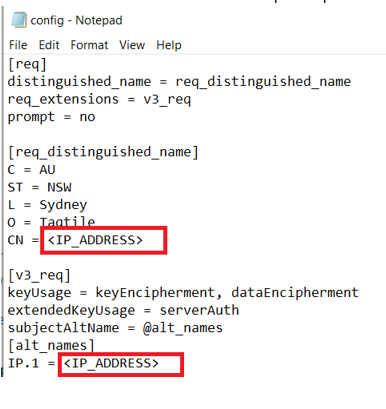
- Open the config.cnf file and SAN.ext file from the. ssl folder in Notepad and replace all instances of <IP_ADDRESS> with your specific IP Address. For example, 192.168.119.171. You will not need to include http or https.

- IMPORTANT: Make sure Open SSL is installed within GitBash and run the following commands from within the. ssl folder in your C:\ drive.

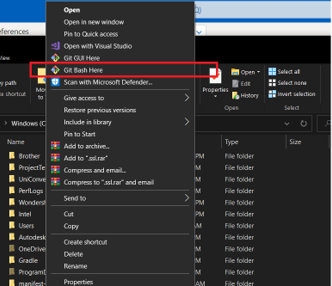
- A quick shortcut for this is to right click on the .ssl folder and select Git Bash Here
- Run command openssl genrsa -out rootCA.key 4096
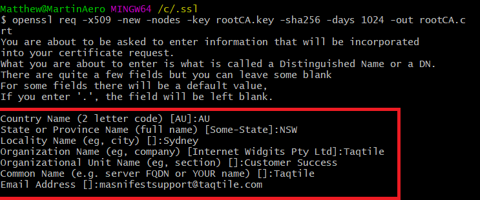
- Run command openssl req -x509 -new -nodes -key rootCA.key -sha256 -days 1024 -out rootCA.crt
- You will be prompted for info like country code, state, email, organization name and Common Name. This can normally be anything as this certificate is not going to be publicly distributed.
- openssl genrsa -out nginx-cert.key 2048
- openssl req -new -key nginx-cert.key -out manifest.csr -config config.cnf
- openssl x509 -req -in manifest.csr -CA rootCA.crt -CAkey rootCA.key -CAcreateserial -out nginx-cert.crt -days 500 -sha256 -extfile SAN.ext
- In your docker-compose file replace </put/path/to/nginx/cert/storage/here> with the file path to your .ssl folder

- Run docker-compose up -d
- Copy the rootCA.crt file and send to your iPad
- Locate the rootCA.crt file within your file’s directory
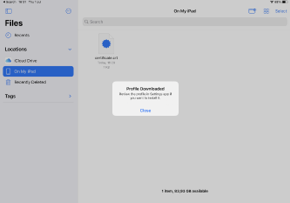
- Click on the rootCA.crt file
- Acknowledge that the profile has been downloaded
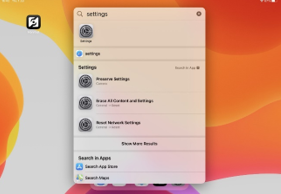
- Open Settings
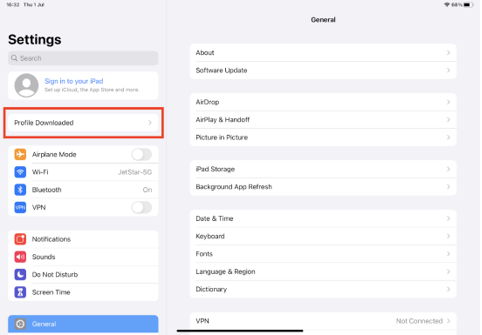
- Press “Profile Downloaded”
- Press “Install”
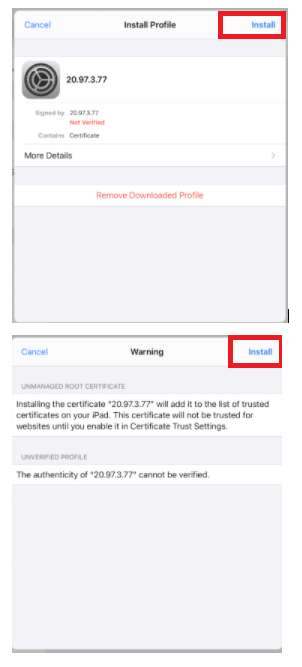
- Press “Done”
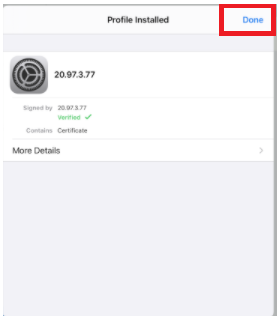
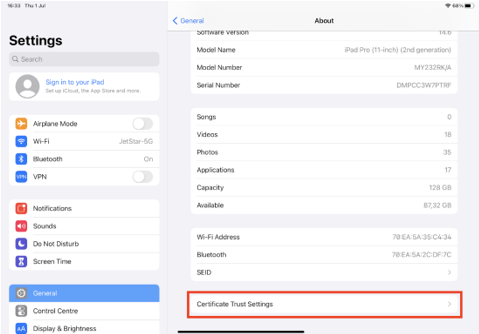
- Open “General” > “About” > “Certificate Trust Settings”. In the section “Enable Full Trust for Root Certificates”, enable the certificate using toggle button. Then click continue.
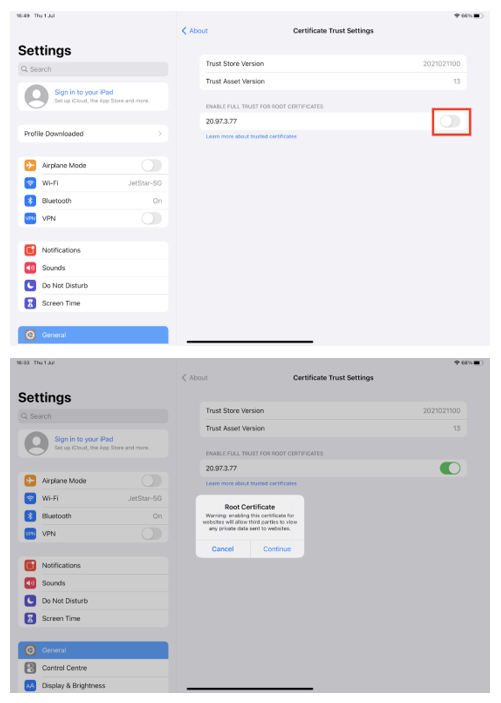
- For more information you can also refer to this guide from Apple for manually trusting the certificate. Trust manually installed certificate profiles in iOS and iPadOS – Apple Support (AU)
- After manually trusting the certificate on iPad, you should have no more SSL warnings and be able to access Manifest on iPad from your on-prem server by using the following domain https://<IP_ADDRESS>
- IMPT! Only use self-signed certificates created and trusted manually in an offline/standalone environment for security reasons. It is NOT recommended to be used for any public facing instance of Manifest.
