About Locations
Locations are a great way to organize work and data within Manifest. While typically, a Location is a physical location such as a specific plant, a discrete part of a facility, or a geographical location such as a city, Locations can also be used to segment distinct groups within a domain. Since both Assets and Work are associated with a specific Location, Locations provide a structured way to organize this data.
Create a Location
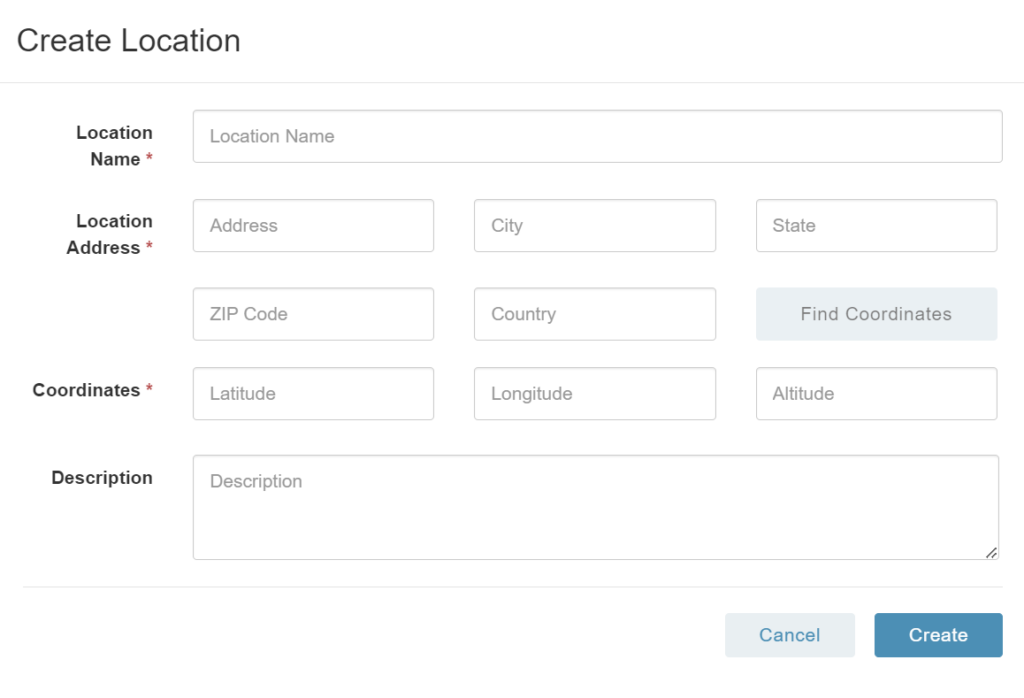
At least one Location must exist in the Manifest application. This will be required to view the Work Window, generate Assets, and create Work. To create a new Location, follow these steps:
- Locate the Locations menu item on the Left-Hand navigation
- Select “+ Location”
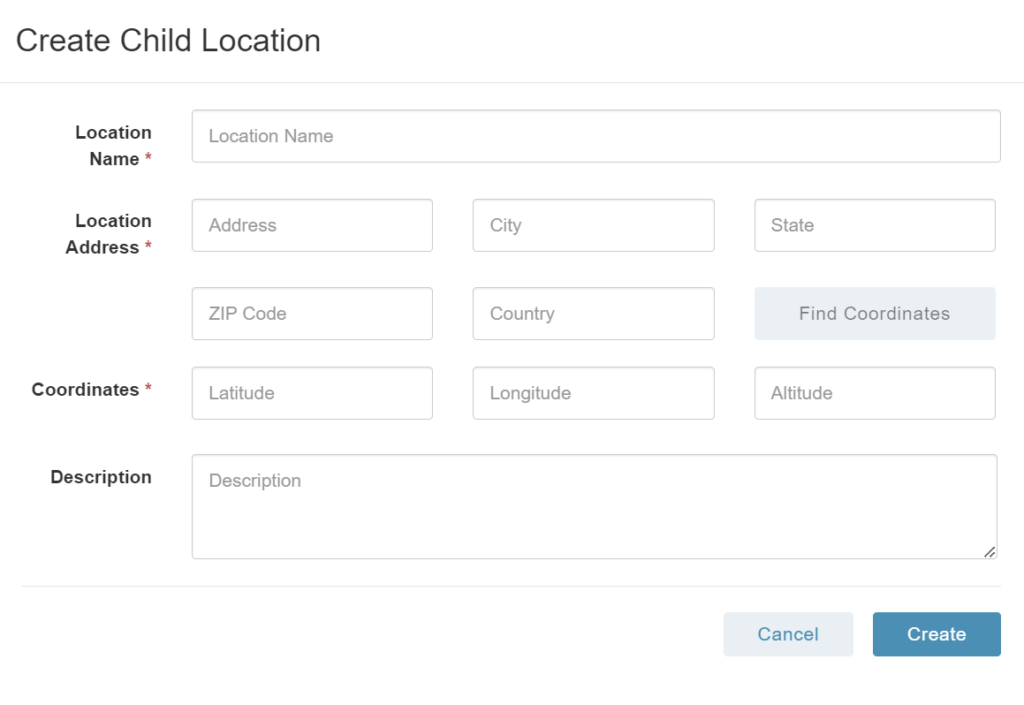
- Enter the Location Name, Location Address (City, State, Zip Code and State)
- Once the address is configured, the ‘Find Coordinates’ button will be enabled from gray to blue
- Click on the ‘Find Coordinates’ and the lat/long coordinates will prefill and a map view of the Location will appear
- Use the description field to add additional information about the Location
- Select ‘Create’ once the Location has been configured
Edit or Delete a Location
- From the Locations listing page, expand the Location that needs to be edited or deleted
- Click on the 3-dot menu to the right of the Location
- Select ‘Edit’ and make the necessary edits to the Location
- Select ‘Delete’ and the Location will be deleted
IMPT! Locations that have associated Assets and/or Work items cannot be deleted. To delete a Location, all related Assets need to be reassigned to another location.

Adding a 3D Model to a Location
To add a 3D Model to a Location:
- From the Locations listing page, expand the Location where the 3D model will be added
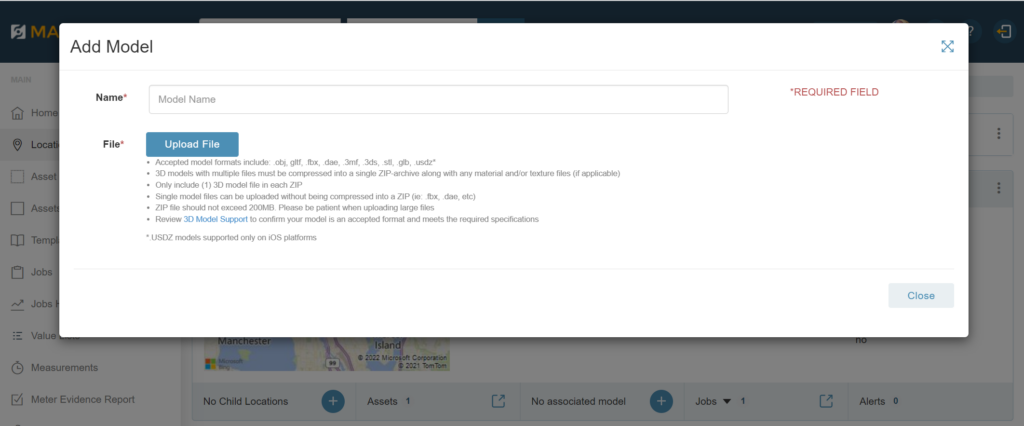
- Select + next to ‘No Associated Model’
- A modal will open where the Modal Name can be configured and a model can be uploaded. The accepted model format types include: .obj, .gltf, .fbx, .dae, .3mf, .stl, .glb, .usdz*
Child Locations
Child Locations are sub-Locations associated with a parent Location.
To add Child Locations:
- From the Locations listing page expand the Location where a Child Location will be added
- Select + on Child Locations
- Enter the Location Name, Location Address and follow the same instructions outlined above
- Select ‘Create’ and the Child Location will now be linked and nested under the parent Location
